You have no items in your shopping cart.
How to Grow San Pedro Cactus: Seeds, Cuttings & Care Guide
Posted under: Ethnobotanicals & Natural Highs
A beginner-friendly guide to growing Echinopsis pachanoi from seeds or cuttings — indoors or out.
The San Pedro cactus is one of the fastest-growing columnar cacti in the world, and many people assume it must be difficult to cultivate. It is not. With the right setup and a bit of patience, you can grow San Pedro cactus successfully — whether you are starting from seed or from a cutting. This guide walks you through everything you need to know, from germination to long-term care.
In this guide: How to grow San Pedro cactus from seeds and from cuttings, step by step. Plus a full care guide covering light, water, soil, temperature, fertilizer, and common problems.
You will also find a comparison of the two growing methods, a supplies table with product links, and practical tips to help you avoid the most common mistakes.
What Is the San Pedro Cactus?
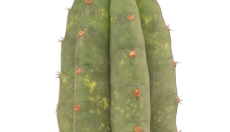
The San Pedro cactus (Echinopsis pachanoi, formerly classified as Trichocereus pachanoi) is a fast-growing columnar cactus native to the Andes mountains of Peru, Ecuador, and Bolivia. It typically grows 6 to 8 ribs along its stem and can reach heights of up to six metres in its natural habitat. At night, it produces large white flowers with a distinctive fragrance — a beautiful reward for patient growers.
San Pedro has been cultivated in the Andes for over 3,000 years and holds deep cultural and ceremonial significance for many indigenous communities. According to ICEERS, it remains one of the most widely used sacred plants in South American traditions. The cactus contains mescaline, an alkaloid with a long history of ceremonial use. The NAISMA overview of Echinopsis pachanoi covers the plant's biology and cultural history in depth.
As a houseplant or garden specimen, San Pedro is prized for its sculptural shape, its impressive growth rate, and its adaptability. It is also a great starting point for anyone curious about psychedelic cacti in general.
Two Ways to Grow San Pedro Cactus
There are two main approaches when you decide to grow San Pedro cactus: starting from seeds or starting from a cutting. Both methods work well. Your best choice depends on how much time you have, your budget, and how many plants you want to end up with.
| Method | Pros | Cons |
|---|---|---|
| From seeds | Cheaper per plant, grow many at once, satisfying process | Slower — seedlings take months to establish |
| From a cutting | Faster results, skips germination entirely | Harder to source, single plant per cutting |
If you want to start simply, our San Pedro Grow Kit (€19.95) includes seeds, soil, a container, and instructions — everything in one box. If you prefer to set up your own grow from scratch, our San Pedro seeds (€13.95) give you 100 Echinopsis pachanoi seeds to work with.
What You Need to Grow San Pedro Cactus
| Item | Notes |
|---|---|
| San Pedro seeds | 100 seeds — €13.95. Or use the grow kit below. |
| San Pedro Grow Kit | 20 seeds + soil + container + instructions — €19.95. Best for beginners. |
| Cactus potting mix | 50% cactus soil + 50% perlite (or pumice) for good drainage |
| Shallow seedling tray or small pots | With drainage holes — critical to prevent root rot |
| Clear plastic cling film or propagation lid | Creates humidity during germination |
| Spray bottle filled with bottled water | Tap water can contain chlorine — bottled or filtered is safer for seedlings |
| Bright windowsill or grow light | South- or west-facing window preferred |
How to Grow San Pedro Cactus from Seeds
Growing from seed is the most economical way to grow San Pedro cactus, and it is genuinely accessible for beginners. The process requires attention in the first few weeks, but once the seedlings are established, they are remarkably resilient.
1
Prepare the soil mix
Prepare the soil mix
Combine 50% cactus potting soil with 50% perlite (or pumice). This ratio provides the drainage that San Pedro needs — roots sitting in wet soil will rot quickly. As an optional but effective precaution, microwave the dry soil for 90 seconds to sterilize it before use. This reduces the risk of mold appearing under the humidity cover later on.
2
Fill your container and moisten the soil
Fill your container and moisten the soil
Fill your seedling tray or small pot to within one centimetre of the top. Moisten the soil evenly with a spray bottle — it should be damp throughout, but not wet. Squeeze a handful: if water drips out, it is too wet. Tip the excess water out of the tray and let it settle for a few minutes before sowing.
3
Place seeds on the surface
Place seeds on the surface
Scatter the seeds across the surface of the soil. Do not bury them — San Pedro seeds need light to germinate. Space them out as evenly as you can, then mist lightly with bottled water. A thin layer of fine sand (1–2 mm) on top is optional, but it helps anchor the seeds and reduces surface drying.
4
Cover and place in a bright spot
Cover and place in a bright spot
Stretch cling film tightly over the container or place a propagation lid on top. This keeps humidity high and speeds up germination. Place the covered tray in a bright location — a sunny windowsill is ideal — but keep it out of direct, intense midday sun for now. The temperature should ideally stay between 20°C and 28°C. Germination typically begins within 1–3 weeks.
Tip: If you are using the San Pedro Grow Kit, the container and soil are already prepared for you — simply follow the included instructions to skip straight to sowing.
5
Gradually open the cover over 2–3 weeks
Gradually open the cover over 2–3 weeks
Once you see the first green seedlings appearing, begin introducing fresh air slowly. Use a toothpick or pencil to punch a few small holes in the cling film every couple of days. This gradual acclimatisation prevents shock from the sudden drop in humidity. Avoid the temptation to remove the cover all at once — seedlings are delicate at this stage.
6
Remove the cover when spines appear
Remove the cover when spines appear
When the seedlings have developed visible spines — usually 4 to 8 weeks after germination — remove the cover entirely. At this point, the young plants are ready to handle normal indoor humidity. Continue misting lightly every few days and begin gradually increasing their light exposure.
How to Grow San Pedro Cactus from a Cutting
Starting from a cutting lets you skip the germination phase entirely. The result is a larger plant sooner. However, the most important rule here is patience: do not rush to water the cutting before it has developed roots.
1
Let the cutting dry (callous) for 1–2 weeks
Let the cutting dry (callous) for 1–2 weeks
Place the fresh cutting in a dry, shaded spot with good airflow. The cut end needs to form a dry callous — a protective skin over the wound — before it can safely go into soil. This usually takes 1 to 2 weeks. Skip this step and the cut end will rot rather than root. Stand the cutting upright or lay it on its side; either position works.
2
Plant in well-draining cactus soil
Plant in well-draining cactus soil
Fill a clean pot with a well-draining cactus mix (50% cactus soil, 50% perlite). Insert the calloused end of the cutting about 3–5 cm into the soil — just enough to keep it upright. Do not compact the soil around it too firmly; loose soil encourages roots to spread.
3
Do not water for 2–4 weeks
Do not water for 2–4 weeks
This is the step that trips up most beginners. After planting, leave the cutting completely dry for 2 to 4 weeks. The cactus will use the stress of drought to stimulate root growth. Watering too early introduces moisture to a wound that has not yet healed underground, which causes rot. Place it in a warm, bright spot — indirect light is fine at this stage.
Important: Resist watering until you see signs of new growth at the top of the cutting or feel slight resistance when you gently tug the plant upward. That resistance means roots have formed.
4
Gradually introduce water and sunlight
Gradually introduce water and sunlight
Once roots are established, begin a light watering routine and increase sun exposure over the following weeks. Start with a gentle watering every 10–14 days and move the plant progressively into brighter light. After 6–8 weeks, you can transition to the full care routine described in the next section.
San Pedro Cactus Care Guide
Once your cactus is established — whether grown from seed or cutting — the care routine is straightforward. San Pedro is a forgiving plant if you respect its core needs: plenty of light, infrequent watering, and good drainage. Here is what to keep in mind as you grow San Pedro cactus through each season.
Light
San Pedro needs at least 6 hours of direct sunlight per day to grow well. A south- or west-facing windowsill is ideal indoors. If you notice the cactus growing thin and elongated — a condition called etiolation — it is not getting enough light. In that case, move it to a brighter spot or add a grow light. Outdoors, allow the plant to adjust gradually to full sun over 2–3 weeks to avoid sunburn on the skin.
Watering
Use the soak-and-dry method: water thoroughly until it drains from the bottom, then let the soil dry out completely before watering again. In summer, this typically means watering every 1–2 weeks. In winter, reduce watering significantly — once a month or even less is enough. Overwatering is the number one cause of death in San Pedro cacti, so when in doubt, wait a few more days.
Soil
Good drainage is non-negotiable. The ideal mix is 40–50% inorganic material (perlite or pumice) combined with organic matter such as peat or coco coir. Commercial cactus mix on its own is often too moisture-retentive — always amend it with extra perlite. Make sure your pot has drainage holes. A layer of coarse gravel at the bottom can help, but a correct soil mix matters more.
Temperature
San Pedro prefers temperatures between 15°C and 30°C. It can tolerate brief cold spells down to around 5°C, but prolonged frost will damage or kill it. In temperate climates like the Netherlands, it grows happily indoors year-round. If you place it outdoors in summer, bring it back inside before the first frost in autumn.
Fertilizer
Feed during the growing season only — spring through early autumn. Use a low-nitrogen fertilizer with higher phosphorus and potassium ratios, formulated for cacti or succulents. Fertilize every 4–6 weeks and stop completely in winter. Over-fertilizing causes soft, weak growth susceptible to disease.
Repotting
San Pedro is a fast grower. Repot every 2–3 years, or when roots appear through the drainage holes. Spring is the best time. Choose a pot only 2–4 cm wider — too much extra space holds moisture and encourages root rot.
Pests
San Pedro cacti are generally hardy, but watch out for mealybugs and scale insects. Mealybugs look like small white cottony clusters at the base of spines or in crevices. Scale insects appear as flat brown or grey bumps on the stem. Treat both by dabbing affected areas with a cotton swab dipped in isopropyl alcohol (70%). For larger infestations, spray the entire plant with diluted neem oil.
Common Problems and How to Fix Them
Even experienced growers encounter problems from time to time. Fortunately, most issues with San Pedro are easy to diagnose once you know what to look for.
Etiolation — thin, elongated growth
Cause: Insufficient light. The cactus stretches toward the nearest light source, producing pale, thin growth. Move it to a sunnier window or supplement with a grow light for 12–14 hours per day.
Root rot — soft, discoloured base
Cause: Overwatering or poor drainage. If the base of the cactus feels soft or mushy and looks brown or black, rot has set in. Remove the cactus from its pot, cut away all rotted tissue with a clean knife, let the healthy tissue dry out for 1–2 weeks, and replant in fresh, dry cactus mix.
Sunburn — white or brown patches on the skin
Cause: Too much direct sun too quickly, especially after a period indoors. Sunburned tissue does not recover, but new growth will be healthy. Move the plant to a slightly shadier spot and introduce it to full sun gradually — about 30 minutes more per day over 2–3 weeks.
For a deeper look at the effects and traditions associated with this cactus, the PubMed study on mescaline and San Pedro ritual provides a solid academic overview. You can also explore our San Pedro user guide, or read more about the most common types of psychedelics for broader context.
Ready to Grow San Pedro Cactus?
Growing San Pedro cactus is genuinely one of the more rewarding plant projects you can take on. The cactus is fast-growing, architectural, and historically fascinating. Whether you start from seed or from a cutting, success comes down to three things: good drainage, enough light, and the patience to let the plant do its thing.
If you are curious about other sacred and ceremonial plants, you might enjoy our articles on shamanism and magic mushrooms or the peyote guide — another Andean plant with deep cultural roots.
Get started today: San Pedro seeds (100 seeds — €13.95) or try the all-in-one San Pedro Grow Kit (€19.95) — includes seeds, soil, container, and instructions.
Note: If you are suffering from a mental illness and are curious about using psilocybin or any other psychedelic therapy, please consult one of the relevant medical authorities first. Do not self-prescribe — it is vital to have the right support and guidance when using psychedelics as medicine.
March 23, 2026