
O seu carrinho de compras está vazio

How to Pick Magic Mushrooms from Your Grow Kit (2026 Update)
Posted under: Growing & Cultivation
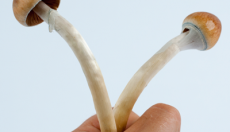
Grow Kit, Monotub, Hybrid Strains, Albino and Enigma — All Your Harvest Questions Answered (2026 Update)
Knowing how to pick magic mushrooms from a grow kit at the right moment is one of the most important skills any home cultivator can learn. Pick too early and the mushrooms are underdeveloped. Pick too late and the veil breaks, spores drop, and the kit ages faster. This complete guide covers everything — from standard grow kits and monotubs to hybrid, albino, and Enigma mutation harvests — so you have a single reference for every question about picking magic mushrooms.
In this guide: Quick-answer FAQ table, how to recognise the ideal harvest moment for standard and specialty strains, the correct twist-and-pull technique, how to handle albino and PE hybrids using the marshmallow-soft test, how to pick from a monotub, what to do with aborts and side pins, how to prepare your kit for the next flush, and how to store your harvest.
This guide covers grow kit and monotub cultivation only. It does not cover picking mushrooms in the wild.
Quick-Answer FAQ: Picking Magic Mushrooms
These are the questions growers ask most often about when and how to pick magic mushrooms from a grow kit or monotub. Each answer links to the full explanation further down the page.
| Question | Short answer |
|---|---|
| When should I pick magic mushrooms from my grow kit? | Just before or as the veil begins to tear — before the cap opens fully and spores drop. |
| How do I pick them without damaging the kit? | Grip at the base of the stem and twist gently while pulling upward — the twist-and-pull technique. |
| Can I pick some and leave others to grow bigger? | Yes — harvest ready mushrooms and leave smaller pins. Check back every 12–24 hours during active fruiting. |
| When do I pick Penis Envy or albino hybrids? | Not by veil — by texture. When the stem feels marshmallow soft and the cap edges curl slightly, it is time. |
| When is an Enigma mutation ready to harvest? | When the mass starts to turn blue at the tips and feels slightly squishy — typically 45–60 days after spawn to bag. |
| Do PE and albino strains drop spores? | Very few to none. Spore drop is not a reliable harvest signal for these strains. |
| What do I do with side pins or bottom pins? | Leave them or harvest carefully — they will not cause contamination if your kit is clean. |
| What are aborts and should I remove them? | Aborts are pins that stopped developing. Always remove them at harvest — they rot and invite contamination. |
| How many flushes can I get? | Typically 2–4 from a standard grow kit. Monotubs can produce more with good aftercare. |
| Can I cut instead of twist-and-pull? | Yes — cutting close to the base works, though it leaves a small stump. Both methods are used in practice. |
| How long do fresh mushrooms last? | 2–5 days in the fridge. Dry them to cracker-dry for storage up to 12 months or more. |
Why Harvest Timing Matters
Mushrooms grow fast — sometimes visibly so within a single day. This rapid development means that the window between "ready" and "too late" can close in 24 hours or less, especially at warmer room temperatures. Understanding the visual signs of readiness is therefore the single most useful skill you can develop as a grower.
Picking at the right moment also protects your kit. When a mushroom drops its spores, it deposits a dark purple-brown print over the surface of the substrate and over nearby mushrooms. This can slow the kit's recovery between flushes and, in some cases, introduce conditions that favour contamination. For a deeper look at exactly when to harvest, our dedicated article on when to harvest magic mushrooms covers timing in detail.
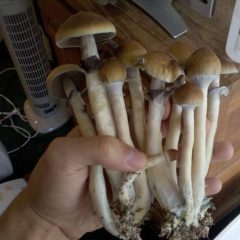
Signs That It Is Time to Pick Magic Mushrooms from Your Grow Kit
The Veil Is Still Intact
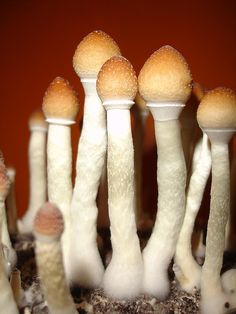
The most reliable visual signal for standard cubensis strains is the condition of the veil — the thin, membrane-like layer that connects the cap edge to the stem. When mushrooms are young, the veil is tight and unbroken. As the mushroom matures, the cap expands and the veil stretches. The right time to pick magic mushrooms from a grow kit is just before or just as the veil begins to tear — but before it has opened completely.
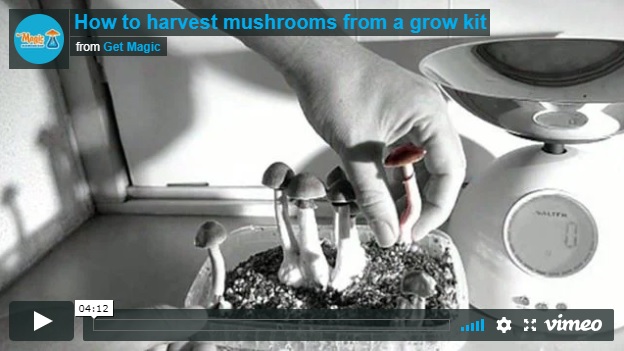
Once the veil tears and the cap flattens out like an umbrella, the mushroom is releasing spores. This is too late for the ideal pick, though the mushroom is still usable at this stage.
Cap Shape and Colour
Look for caps that are still dome-shaped or slightly conical — like a closed or just-opening fist. The cap surface should be solid and opaque, not translucent or pale. Colour varies by strain: Golden Teacher caps will be golden-brown, while McKennaii or B+ caps may appear lighter or darker. Across all standard cubensis strains, a convex cap with an intact veil is your green light to pick magic mushrooms from a grow kit.
Stem Height and Firmness
A mushroom that is ready to pick will feel firm when you gently pinch the stem near its base. Soft or hollow-feeling stems, or stems that have grown extremely tall and thin, indicate that the mushroom has been developing for too long in conditions with too much CO₂ and not enough light. These can still be harvested, but they are a sign to review your fruiting chamber environment.
Tip: When in doubt, pick earlier rather than later. A slightly underdeveloped mushroom is always preferable to one that has opened and dropped spores across the kit surface.
Picking Hybrid and Albino Mushrooms: The Marshmallow Soft Test
Some of the most popular strains — including Penis Envy, Albino Penis Envy (APE), and other PE hybrids — behave very differently from standard cubensis at harvest time. These mushrooms often have a poorly defined or early-breaking veil, and they drop few or no visible spores. Because the classic "wait for the veil to break" rule does not work well for these strains, you need to read different signals to know exactly when to pick magic mushrooms from a grow kit containing these varieties.
The Two Signals That Matter for PE and Albino Hybrids
Experienced growers on Reddit and Shroomery consistently describe the same two-step check for Penis Envy and albino hybrids. First, watch the cap: when the edges start to curl very slightly upward and the cap has clearly stopped expanding, the mushroom has reached its full size. Second, and more importantly, feel the stem. A mature PE or albino hybrid mushroom becomes noticeably soft and springy — the texture most growers describe as "marshmallow soft." You can feel this give even through the grow bag by gently squeezing the stem near the base.
Tip: Think of it as a squeeze test. If the stem feels like celery or a firm apple, leave it to develop. If it gives like a slightly deflated marshmallow — springy but soft — it is time to pick. Do not wait until the stem feels watery or limp; that means the mushroom has passed its peak and quality is dropping.
PE veils often break very early during growth — sometimes only a day or two after pins form — which is not the harvest signal. Focus on size and texture rather than veil condition. Because PE-type strains drop very few or no spores, you have a somewhat wider harvest window than with heavy spore-droppers, but marshmallow-soft and cap-edges-curling is still the ideal moment.
Picking PE Blobs and Mutant Growth Forms
First flushes of Penis Envy and many PE hybrids often produce irregular blob-like or poorly differentiated shapes with no clear cap-and-stem structure. For these, the same marshmallow-soft test applies: when the blob stops clearly growing over a 24-hour period and its surface begins to feel soft and springy, it is ready. Once they reach this texture, blobs twist off the substrate cleanly with a gentle rotation. There is no harm in harvesting early if you are unsure — a slightly underdeveloped PE is still a good harvest.
Picking Enigma Mutations
Enigma is a sterile mutation of cubensis that produces coral- or brain-like masses with no distinct cap or veil. It does not fruit like a normal mushroom and requires a completely different approach. Enigma takes significantly longer than standard strains — typically 45 to 60 days from spawn to bag before the mass is ready to harvest.
The Blueing Signal
The primary harvest indicator for Enigma is the appearance of blue colouring at the tips of the fruiting mass. This bruising is caused by oxidation of psilocin and signals that the mass has reached maturity. A light blueing across 10–20% of the surface is the ideal harvest window. If you wait until 50% or more is blue, the risk of rot inside the mass increases significantly, especially at warmer temperatures. Harvest as soon as you see consistent blueing starting to spread.
Note: Do not harvest Enigma too early — the mass should feel like a "somewhat under-inflated basketball": firm with a slight give. The texture should be clearly squishy and marshmallow-soft, not hard. If it is still very firm with no blue colouring, leave it and check again in a few days.
Enigma requires low fresh air exchange and high humidity throughout its long growth period. Avoid opening the tub frequently, as this disrupts the CO₂-rich environment the mutation needs to form its characteristic brain-like structures. Patience is the key skill with Enigma: resist the urge to check it daily and trust the process until that first blue colouring appears.
How to Pick Magic Mushrooms from a Grow Kit: The Technique
The correct method to pick magic mushrooms from a grow kit is a firm, gentle twist-and-pull. This removes the entire mushroom — including the base — without leaving behind a stump that can rot and invite contamination.
1
Wash Your Hands
Wash Your Hands
Before you touch the kit, wash your hands thoroughly with soap and water. Alternatively, use a hand disinfectant gel. The mycelium in your kit is vulnerable to bacteria and oils from your skin. Starting clean is not optional — it is essential for keeping your kit healthy between flushes. For a full overview of hygiene during cultivation, see our guide on hygienic precautions when growing magic mushrooms.
2
Grip the Mushroom at the Base
Grip the Mushroom at the Base
Grip the stem as low as possible — as close to where it meets the substrate surface as you can manage. Use your thumb and forefinger. Avoid gripping the cap, as this can bruise the flesh and damage nearby pins that have not yet developed.
3
Twist Gently While Pulling
Twist Gently While Pulling
With your grip at the base, twist the mushroom slightly — about a quarter turn — while applying steady upward pressure. The combination of rotation and pulling releases the mycelial connection at the base cleanly. Avoid jerking or pulling straight up without twisting, as this can tear the substrate and leave a broken base that rots.
4
Remove the Entire Cluster at Once
Remove the Entire Cluster at Once
Mushrooms from a grow kit often grow in tight clusters. It is usually best to harvest an entire cluster together rather than picking individual mushrooms one by one. Work from the edges of the cluster inward, freeing each mushroom until you can remove the whole cluster with one final pull. This minimises disturbance to the substrate surface and reduces the number of small stump wounds left behind.
5
Check for and Remove Aborts
Check for and Remove Aborts
After picking the mature mushrooms, inspect the surface for aborts — small, underdeveloped pins that stopped growing before they reached maturity. Remove these at the same time. Leaving aborts on the substrate surface causes them to rot and can trigger contamination. For guidance on why aborts occur and how to prevent them, see our post on mushroom aborts — what they are and what to do.
Picking from a Monotub: What Is Different
Harvesting from a monotub follows the same principles as a grow kit, but the larger surface area and deeper substrate mean a few extra considerations. Monotubs often produce more uneven flushes — some clusters develop faster than others across the same surface. This means partial harvests are common and entirely normal.
Partial vs. Full Harvest
In a monotub, you can pick the mushrooms that are ready and leave smaller pins to continue developing. Check the tub two to three times a day during active fruiting — mushrooms can grow surprisingly fast in their final 12 to 24 hours. If spore drop begins on any mushrooms, harvest everything in that area immediately, even if smaller pins are not fully developed, to prevent spores settling on the substrate.
Side Pins and Bottom Pins
Monotubs frequently produce side pins or bottom pins — mushrooms that grow on the sides of the substrate block where it contacts the tub wall. You can leave these in place if they are too difficult to reach. Healthy mycelium will reabsorb them without contamination. If you can reach them comfortably, harvest them along with the top surface flush. To prevent side pins from forming in future grows, use a liner inside the tub to block light reaching the sides of the substrate.
Tip: After harvesting from a monotub, wipe the interior walls clean with a damp cloth to remove any spore deposits and condensation before closing the tub for the next flush.
After the Harvest: Preparing for the Next Flush
Your grow kit is not finished after the first flush. Most kits are capable of producing two to four flushes or more under the right conditions. The two most productive flushes are typically the first and second — together they usually account for the majority of the total yield from a kit.
Clean the Surface
After removing all mushrooms and aborts, inspect the substrate surface carefully. Use clean fingers or a clean spoon to remove any remaining stumps, torn substrate fragments, or dead mycelium. A clean, smooth surface is much less likely to develop mould or bacterial contamination before the next flush. If you notice any green, black, or pink patches at this stage, check our guide on grow kit contamination before proceeding.
Soak or Dunk the Kit
The substrate loses moisture with every flush. Rehydrating it between flushes is one of the most important steps for maintaining productivity. For most grow kits, this means placing the substrate block in a container of clean water and allowing it to soak for 6 to 12 hours. The mycelium absorbs water during this period and is then ready to fruit again. After soaking, drain the kit thoroughly and return it to its grow bag with the bag partially open for fresh air exchange. Pins should begin forming again within a few days to a week.
Note: Do not oversoak. Extended soaking can cause the substrate to become waterlogged and create conditions favourable to bacterial contamination. If in doubt, soak for 6 hours rather than 12.
Drying and Storing Your Harvest
Fresh mushrooms have a very short shelf life — typically just two to five days in the refrigerator before they begin to deteriorate. For longer storage, drying is strongly recommended. Our guide on how to dry and store magic mushrooms explains the best methods for achieving a cracker-dry result without compromising potency. Properly dried mushrooms stored in an airtight container with a silica gel sachet can keep for 12 months or more.
Tip: Never use a microwave to dry mushrooms. The heat degrades the active compounds quickly. Air drying on a mesh rack in front of a fan, or using a food dehydrator set to 45–50°C, gives the best results. The target is a cracker-dry texture — if the mushroom bends without snapping, it needs more time.
Common Picking Mistakes and How to Avoid Them
Leaving Stumps in the Substrate
Stumps — the base of the mushroom left behind when a stem is broken rather than cleanly removed — are one of the most common causes of contamination between flushes. Always use the twist-and-pull technique to ensure a clean removal. If a stump does remain, remove it with a clean implement rather than leaving it in place.
Picking Too Late and Allowing Spore Drops
A spore print dropped across the substrate surface leaves a thick purple-brown deposit that can interfere with the next flush. Some growers also experience unexpected effects simply from breathing in spore-rich air when handling a kit that has dropped spores. Always harvest before the veil breaks. If you are not sure whether a mushroom is ready, err on the side of picking it.
Some growers wonder whether early-picked or open-capped mushrooms differ in effect. Our post on dud flushes and why some mushrooms have no effect addresses the factors that actually influence mushroom quality beyond harvest timing.
Touching the Kit Without Washing Your Hands
This is one of the most avoidable contamination risks in home cultivation. Bacteria from your skin, oils, and everyday surfaces transfer easily to the substrate during picking. Make hand-washing a non-negotiable habit before every interaction with the kit — not just at harvest time, but during misting, fanning, and any other maintenance.
Using the Wrong Harvest Signal for PE and Hybrid Strains
Applying the veil-break rule to Penis Envy or albino hybrids is the single most common mistake growers make with these strains. The veil breaks very early in PE growth — often when the mushroom is nowhere near mature. Harvesting at veil break means harvesting too soon and leaving significant size and weight on the table. Always use the marshmallow-soft stem test for these strains.
Complete Picking Checklist
Before each harvest session, run through this list to make sure you are set up correctly:
Following this process consistently gives your kit the best chance of producing strong, healthy flushes over multiple cycles. If your kit is not producing as expected, our full range of magic mushroom grow kits includes options suitable for beginners and experienced growers alike.
Ready to grow your next kit? Browse our full selection of magic mushroom grow kits — easy to use, fast to fruit, and backed by years of grower experience.
Note: If you are suffering from a mental illness and are curious about using psilocybin or any other psychedelic therapy, please consult one of the relevant medical authorities first. Do not self-prescribe — it is vital to have the right support and guidance when using psychedelics as medicine.


August 3, 2018