Votre panier est vide.
How Does a Magic Mushroom Grow Kit Work?
Publié sous: Growing & Cultivation
Everything you need to know about what is inside the box, how to start growing, and how to harvest your own fresh magic mushrooms at home.
A magic mushroom grow kit is a ready-to-use box that contains fully colonised substrate. In other words, the mycelium has already grown through the growing material. All you need to do is add water, create the right climate, and wait for mushrooms to appear. There is no need to work with spores, sterilise jars, or prepare substrate yourself. Within two to three weeks, you can harvest your first flush of fresh Psilocybe cubensis mushrooms.
In this guide, we explain exactly how a magic mushroom grow kit works. You will learn what each component does, how to set up the kit step by step, and how to get the most mushrooms out of every flush. If you want to skip straight to the official setup instructions, visit our grow kit instructions page.
What Is Inside a Magic Mushroom Grow Kit?
Every magic mushroom grow kit from our shop arrives with the same core components. Together, they create a complete mini-environment for mushroom fruiting.
| Component | What it does |
|---|---|
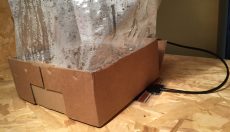
| Grow box with substrate | A plastic container filled with rye-based substrate that is fully colonised by Psilocybe cubensis mycelium. This is the engine of your kit – the mycelium feeds on the substrate and produces mushrooms. |
| Grow bag with air filter | A transparent bag that fits over the grow box. It holds in humidity while the built-in microfilter allows fresh air exchange. This prevents contamination and keeps conditions stable. |
| Paperclips | Used to close the grow bag after misting. They keep the bag sealed loosely enough for air exchange but tightly enough to maintain humidity. |
The white layer you see through the sides and on top of the substrate is the mycelium. It looks like a dense web of tiny white threads. This living network is what produces the mushrooms once you trigger the fruiting process. For a deeper look at what mycelium is and how it functions, read our article on mycelium explained.
How to Start Your Magic Mushroom Grow Kit
Setting up the kit takes about ten minutes. After that, the mycelium does most of the work. Follow these steps carefully for the best results.
1Wash your hands thoroughly
Before touching anything, wash your hands with antibacterial soap or use disinfectant gel. Contamination is the number one reason grow kits fail. A clean workspace makes all the difference.
2Soak the substrate
Remove the lid of the grow box. Fill the box with lukewarm water until the substrate is fully submerged. Place the lid back on and let it soak for 12 hours. This step rehydrates the mycelium and triggers the fruiting process.
3Drain the excess water
After 12 hours, carefully pour off all excess water. The substrate should be moist but not waterlogged. Standing water can cause bacterial growth and harm the mycelium.
4Place the box inside the grow bag
Slide the grow box into the grow bag. The opening of the bag should face upward. Fold the top of the bag loosely and secure it with the paperclips. The bag traps moisture while the microfilter allows gas exchange.
5Find the right spot
Place the kit in a warm location with indirect light. The ideal growing temperature is between 23°C and 25°C. Avoid direct sunlight, radiators, and draughty areas. A consistent temperature speeds up the process and leads to more even growth.
6Mist daily
Open the bag once or twice a day. Spray a fine mist of clean water on the inside walls of the bag – not directly on the substrate. Reseal with the paperclips. This keeps humidity high, which the mushrooms need to grow.
Tip: If you see small water droplets on the inside of the bag, humidity is good. If the bag looks dry, mist a little more. If you see puddles at the bottom, you are over-misting.
What Happens After You Start the Magic Mushroom Grow Kit
After setup, the mycelium responds to the fresh water and air by shifting from growth mode to fruiting mode. Here is the typical timeline.
| Timeframe | What you will see |
|---|---|
| Days 1–5 | Little visible change. The mycelium is reactivating beneath the surface. |
| Days 5–10 | Tiny white bumps called pins appear on the surface. These are baby mushrooms. |
| Days 10–15 | Pins grow rapidly into full-sized mushrooms. Caps expand and stems elongate, sometimes doubling in size overnight. |
| Days 14–21 | Mushrooms are ready to harvest when the caps begin to open but before they release spores. |
Not every pin makes it to full size. Some stop growing and darken. These are called aborts. They are normal and still contain psilocybin – you can harvest and use them.
Important: The exact timeline depends on the strain and temperature. Warmer conditions (within the safe range) generally speed things up. Cooler conditions slow growth but do not kill the mycelium as long as it stays above 18°C.
How to Harvest Your Mushrooms
Timing your harvest correctly is important for potency and for keeping the kit healthy for future flushes. The ideal moment is when the caps have expanded but the thin membrane (veil) underneath has not yet torn. Once the veil breaks, the mushroom releases spores. Spores form a dark layer on the substrate that can reduce future yields.
To pick a mushroom, grip it gently at the base of the stem. Twist and pull carefully until it separates from the substrate. Avoid pulling chunks of substrate out with it. For a detailed walkthrough, see our guide on when to harvest magic mushrooms.
After harvesting, you can eat the mushrooms fresh or dry them for storage. Dried mushrooms keep their potency for months when stored in an airtight container in a cool, dark place.
Multiple Flushes from One Magic Mushroom Grow Kit
One of the best things about a magic mushroom grow kit is that it produces multiple harvests. Each harvest is called a flush. Most kits deliver two to three flushes, and some produce even more.
After you pick all the mushrooms from the first flush, soak the substrate again in clean water for 12 hours. This is exactly the same process as step 2 above. Drain the water, return the box to the grow bag, and resume daily misting. New pins typically appear within five to ten days.
Each flush usually produces a little less than the previous one. This is because the mycelium gradually runs out of nutrients in the substrate. A healthy kit often yields 200–400 g of fresh mushrooms across all flushes combined, depending on the strain and growing conditions.
Tip: After your final flush, you can place the exhausted substrate outdoors in a shady, moist spot. Mushrooms may still appear after rain during warm months. It is a fun experiment, though yields are unpredictable.
Which Strains Are Available?
All of our grow kits contain Psilocybe cubensis, but each strain has its own character. Some are beginner-friendly, others are better for experienced growers. Here are a few popular options.
| Strain | Difficulty | Character |
|---|---|---|
| Golden Teacher | Beginner | Reliable yields, well-balanced effects, excellent first-time choice |
| B+ | Beginner | Large mushrooms, forgiving of temperature fluctuations |
| McKennaii | Intermediate | Higher potency, intense visual experience |
| Colombian | Beginner | Fast coloniser, generous flushes, warm and social trip |
For a complete breakdown of every strain, including potency and growing tips, check our strain guide.
Common Mistakes to Avoid
Growing from a kit is straightforward, but small errors can reduce your yield. Here are the most common pitfalls.
If you notice green, black, or orange patches on the substrate, that is contamination. Remove the kit from your living space immediately. For more prevention strategies, read our guide on hygienic mushroom growing.
Grow Kit vs. Growing from Scratch
A magic mushroom grow kit is the fastest and easiest way to grow your own mushrooms. However, some cultivators prefer to start from spores and build their own substrate. Here is how the two approaches compare.
| Factor | Grow kit | From scratch |
|---|---|---|
| Setup time | 10 minutes | Several days (sterilisation, inoculation, incubation) |
| Equipment needed | None – everything is included | Pressure cooker, jars, spore vial, substrate ingredients |
| Time to first harvest | 2–3 weeks | 6–8 weeks |
| Contamination risk | Low – substrate is pre-sterilised and colonised | Higher – multiple sterile transfers required |
| Learning curve | Minimal | Moderate to steep |
| Customisation | Limited to available strains | Full control over substrate, strain, and technique |
If you want to try the advanced route, start with our guide on growing mushrooms from spores. It covers everything from choosing a spore vial to your first harvest.
Ready to start growing? Browse our full range of magic mushroom grow kits – available in over a dozen strains, with worldwide shipping.
Mars 23, 2026