
Sie haben keine Artikel in Ihrem Warenkorb.

How to Build a DIY IKEA Monotub: A Step-by-Step Guide
Posted under: Anbau & Kultivierung
Growing & Cultivation · Evergreen guide · 16 min read
A DIY IKEA monotub is the cheapest reliable cultivation chamber you can build in Europe. One trip to IKEA, one small box of filters, one hole-saw, and you have a working tub for under € 40. This guide breaks the build into nine concrete steps, lists every IKEA article number with May 2026 prices, and gives you two ready-to-shop kit lists — one for a starter-friendly shoebox-tek and one for the standard 45 L monotub.
Scope of this guide. This post covers the build only. You will end with a clean, vented SAMLA box ready to receive substrate. Substrate mixing, spawn, colonisation and fruiting all live in their own posts so each step can be explained properly.
New to tub cultivation? Read our short primer on how a ready-made grow kit works first. A monotub does the same job, only bigger and with more control over fresh air exchange.
Why a DIY IKEA monotub makes sense in Europe
Most published monotub guides come from the United States and reference Sterilite or IRIS USA boxes — unavailable here or absurdly expensive to import. European growers have quietly converged on the IKEA SAMLA: transparent, cheap, stocked across the Netherlands, Germany, Belgium, France, Spain and the UK. Importantly, IKEA article numbers are globally identical — the same SAMLA 45 L box carries the same code in Amsterdam, London, Riga and Sydney, which makes this guide directly usable wherever you live.
The SAMLA series is documented on the IKEA Netherlands SAMLA catalogue, and the UK guide on monotub.co.uk confirms the same volume range as the European default. In other words, this is a well-trodden path — just one that rarely gets written up clearly from a European perspective.
Mycology terminology — monotub vs shoebox-tek
Before we start drilling, two names you will see across grower forums:
The build technique is essentially the same. Both use side-wall filters for fresh air exchange (FAE), both keep the lid clipped closed, and both follow the same drill-and-stick workflow. Only the dimensions and the number of holes change.
Which one should you build first? If this is your first cultivation project, start with the 22 L shoebox-tek. The community consensus from grower forums is unanimous on this: smaller boxes mean lower contamination risk, less spawn at stake, and a gentler learning curve. Once you have one or two successful flushes behind you, scale up to the 45 L monotub for larger yields.
The build at a glance
Before we walk through each step, here is the complete build in one table. The same nine-step workflow applies to both the 22 L shoebox-tek and the 45 L monotub — only the box, the filter size and the number of holes differ. The example below shows the 45 L build because that is the most common European target build.
| # | Step | Time | Tools / parts |
|---|---|---|---|
| 1 | Pick the right SAMLA size | — | SAMLA 45 L combo (496.196.51) |
| 2 | Gather tools and filters | — | Drill, hole-saw, marker, MMS filters |
| 3 | Mark the six holes on the box | 5 min | Marker, tape measure |
| 4 | Drill the pilot holes | 5 min | 3 mm bit (or 7.1 mm cobalt bit) |
| 5 | Cut the main holes — hole-saw in reverse | 10 min | 50 mm hole-saw (45 L) or 25 mm (22 L) |
| 6 | Smooth the rim of each hole | 5 min | Craft knife or fine sandpaper |
| 7 | Disinfect the box | 5 min | Meliseptol® spray, cloth |
| 8 | Stick the self-adhesive filters in place | 5 min | 6× 65 mm monotub filters |
| 9 | Snap the lid clip-locks and store | 1 min | — |
Total active time is under an hour, and the finished DIY IKEA monotub is ready to receive substrate whenever you are.
Step 1 — Pick the right SAMLA size
IKEA sells the SAMLA series in seven volumes. Only some of them work as a monotub. The 45 L is the sweet spot for almost every home grower, with the 22 L as the standard shoebox-tek option.
| SAMLA volume | Dimensions (l × w × h) | Price with lid (NL, May 2026) | Use as monotub? |
|---|---|---|---|
| 5 L | 28 × 19 × 14 cm | € 2.49 | Too small — micro tests only |
| 11 L | 39 × 28 × 14 cm | € 3.49 | Smallest shoebox-tek (shallow) |
| 22 L | 39 × 28 × 28 cm | € 5.49 | Yes — shoebox-tek / mini-monotub |
| 45 L | 57 × 39 × 28 cm | € 8.99 (combo € 9.48) | Yes — standard monotub (recommended) |
| 55 L | 78 × 56 × 18 cm | € 12.99 | No — too shallow at 18 cm |
| 65 L | 56 × 39 × 42 cm | € 11.99 | Yes — bulk build |
| 130 L | 78 × 56 × 43 cm | € 19.99 | Too large for most first builds |
The 45 L SAMLA has the right height-to-footprint ratio. Its 28 cm depth gives roughly 10 cm for substrate and a comfortable 15 cm headroom for fruit development.
IKEA article numbers (worldwide identical)
IKEA article numbers do not change between countries — the codes below are the same in Amsterdam, London, Berlin and Riga. Prices were checked at IKEA Nederland in May 2026 and will of course drift slightly year on year.
| What you get | IKEA article # | Price (NL, May 2026) | Notes |
|---|---|---|---|
| 45 L SAMLA combo — box + lid + clip-locks in one product | 496.196.51 | € 9.48 | Recommended. Cheapest path and you walk out with everything you need from the SAMLA section. |
| 45 L SAMLA box + lid (without clip-locks) | 694.407.61 | € 8.99 | Older bundle. Clip-locks sold separately. |
| 45 L box only (replacement) | 301.029.74 | € 5.99 | Useful if your existing lid is fine but the box cracked. |
| 45 L lid only (replacement) | 704.550.87 | € 3.00 | Useful if you over-drilled the lid and want a fresh one. |
| Clip-locks 4-pack (fits 45 L & 65 L) | 705.906.03 | € 0.50 | Only needed if you bought 694.407.61 or a loose lid. |
| 22 L SAMLA box + lid (shoebox-tek) | 694.408.22 | € 6.49 | Default shoebox-tek box. |
| 22 L box only (replacement) | 801.029.76 | € 4.49 | 11 L and 22 L share the same lid. |
| 11 L / 22 L lid only | 904.550.86 | € 1.00 | Replacement lid for both small SAMLA sizes. |
Avoid these IKEA boxes. KLÄMTARE (dark grey, opaque), SOCKERBIT (white, opaque), TROFAST (no proper lid), GLIS (too small) and SAMLA 55 L (too shallow at 18 cm). Transparency matters because it lets you watch colonisation through the wall without opening the tub.
Step 2 — Gather tools and filters
This is where most beginners get confused, because the MMS filter range covers four diameters plus an injection port that looks superficially similar. The table below pairs every hole on the box with the exact MMS product that goes into it.
Tools you need
also serves as a pilot here — and is the same bit you will need later for drilling grain-jar lids when you start preparing spawn. See our guide on how to sterilise your cultivation materials for the grain-jar workflow.
and a clean cloth
Which hole-saw goes with which filter
The single most-asked question from beginners: what size hole-saw do I buy? The rule is straightforward — always drill a hole that is roughly 15 to 20 mm smaller than the filter itself, so the adhesive ring on the outside of the filter has flat plastic to seal against. These are the standard sizes used across the European and US monotub community.
| Filter (MMS) | Filter diameter | Hole-saw size | Imperial equivalent |
|---|---|---|---|
| 38 mm | 25 mm hole-saw | 1" | |
| 65 mm | 50 mm hole-saw | 2" | |
| 90 mm | 75 mm hole-saw | 3" | |
(optional) |
18 mm | 18 mm hole-saw or step-bit | 11/16" |
Practically: for a 45 L monotub you buy one 50 mm hole-saw and you are done. For a 22 L shoebox-tek you buy one 25 mm hole-saw. Hole-saw sets sold at any European DIY chain (Hornbach, Praxis, Gamma, B&Q, Bauhaus) cover the 25–75 mm range for under € 20.
Filters and ports — which one goes where
This is the single most useful table in the post. Memorise this and the rest of the build is obvious.
| MMS product | Diameter | Goes in | Function |
|---|---|---|---|
| 38 mm | 22 L shoebox-tek side walls (4 holes) | Fresh Air Exchange (FAE) — primary filter for the smaller build | |
| 65 mm | 45 L monotub side walls (6 holes) | Fresh Air Exchange (FAE) — primary filter for the standard build | |
| 90 mm | Side walls (65 L or 130 L bulk only) | Maximum FAE for bulk builds | |
| 18 mm | Lid (optional, advanced workflows only) | Self-healing rubber for syringe inoculation — rarely needed at the monotub stage |
For a standard 45 L DIY IKEA monotub, the filter kit is therefore 6× 65 mm side filters and nothing on the lid. The lid stays closed and unbroken — all gas exchange happens through the six side filters. This matches the European community consensus and what the monotub.co.uk build guide recommends.
Do you need an injection port?
Short answer: no — not for a standard monotub build.
An
is a self-healing rubber disc that lets you push a syringe through the lid and inject spores or liquid culture without opening the box. It is designed for spawn jars and spawn bags — where you inject sterile grain with sterile spore solution and let it colonise before mixing into substrate.
A monotub is different. By the time you fill a monotub, your spawn is already colonised. You just open the lid, mix the spawn into the substrate, close the lid, and walk away. No injection happens at the monotub stage.
When you might still want one: if you plan a "spore-to-tub" workflow (advanced — injecting a multi-spore syringe directly into a sterilised bulk substrate inside the monotub). For 95 % of growers, skip the port and save € 4 to € 5.
Step 3 — Mark the six holes on the box
The drill pattern for a 45 L SAMLA
The aim is balanced fresh air exchange without creating drafts. For a 45 L SAMLA, the standard pattern is six holes total:
Mark every centre point with permanent marker before you touch the drill. Double-check spacing — symmetrical holes look professional and vent evenly.
Hole pattern by SAMLA size
| SAMLA | Side-wall holes | Side filter size |
|---|---|---|
| 22 L (shoebox-tek) | 4 (1 per short side + 1 per long side) | 38 mm filter |
| 45 L (standard monotub) | 6 (1 per short side + 2 per long side) | 65 mm filter |
| 65 L (bulk) | 6 to 8 (1–2 per short side + 2 per long side) | 65 mm or 90 mm filter |
| 130 L (large bulk) | 8 (2 per short side + 2 per long side) | 90 mm filter |
Step 4 — Drill the pilot holes
Why pilot first?
A pilot hole stops the hole-saw from wandering and lets heat escape, which prevents the polypropylene wall from cracking. Polypropylene is unforgiving — it cracks in long lines if the bit grabs.
Step 5 — Cut the main holes with the hole-saw in reverse
The single most important technique
Set your drill to reverse rotation and let the hole-saw cut by friction rather than by chip removal. The plastic melts slightly along the cut line instead of cracking, and the edge comes out smoother than a forward cut.
This single trick — running the hole-saw in reverse — is what separates a clean DIY IKEA monotub from a cracked one. The Wildspore PP vs PE safety guide explains the material science if you want the long version.
Ventilate and mask up. Drilling melts a thin film of PP at the cut edge. The fumes are not friendly to breathe. Open a window, run a fan, and wear a simple disposable face mask. The whole job takes ten minutes.
Step 6 — Smooth the rim of each hole
Why this matters for filter adhesion
The self-adhesive filters in the next step need a flat surface to seal properly. Any burr or rough edge creates a gap, and a gap means contamination risk.
Step 7 — Disinfect the box
Prep the surface for the adhesive filters
A dust-free, oil-free surface is essential. The adhesive on the MMS filters is strong, but it cannot bond through grease or marker residue. Meliseptol® is the same surface disinfectant used in professional lab work — it evaporates without residue and leaves a clean bonding surface.
Step 8 — Stick the self-adhesive filters in place
Six side filters on the outside
If you decided to add an injection port for an advanced spore-to-tub workflow, drill one additional 18 mm hole in the lid now, smooth the rim, and press the port into place with the self-healing rubber facing upward.
Filter placement recap — 45 L monotub
| Position | Hole size | MMS product | Quantity (45 L) |
|---|---|---|---|
| Long side wall (at substrate height) | 65 mm | Monotub Filter 65 mm | 4 |
| Short side wall (high, 2 cm from top) | 65 mm | Monotub Filter 65 mm | 2 |
| Lid (optional injection port) | 18 mm | Injection Port 18 mm | 0 or 1 |
Step 9 — Snap the lid clip-locks and store
Finishing the DIY IKEA monotub
Some builders tape over the filters during storage with painter's tape to keep dust out of the membrane. This is optional but useful if the tub sits unused for more than a week.
One final note on safety. Keep the finished tub out of reach of children and pets, and store it well away from heat sources. SAMLA is rated for cool, dry storage — not for direct sun, oven heat or radiator warmth. Polypropylene deforms permanently when it overheats, and a warped tub will never seal properly again.
Complete shopping lists — two kits, May 2026 prices
Two kits below: the smaller 22 L shoebox-tek (the recommended starter build) and the standard 45 L monotub (the next step up). Both lists give you the IKEA article number, the MMS product ID, and approximate May 2026 prices at IKEA Nederland. Prices drift year on year — always re-check at the IKEA counter.
Kit A — 22 L shoebox-tek (recommended starter build)
| Item | Code | Qty | Price (May 2026) |
|---|---|---|---|
| SAMLA 22 L — box + lid | IKEA 694.408.22 | 1 | € 6.49 |
| MMS | 4 | ± € 14 | |
| MMS | 1 | ± € 8 | |
(also for grain jars) |
MMS | 1 | ± € 5 |
| Total | — | — | ± € 33 |
Shoebox-tek is the build of choice for first attempts. Smaller substrate volume means lower stakes if contamination strikes, and the 22 L SAMLA fits on a normal shelf. Replacement parts are straightforward too: the 11 L/22 L lid (article 904.550.86, € 1.00) is shared between the two smallest SAMLA sizes, and the 22 L box on its own carries article 801.029.76 at € 4.49.
Kit B — 45 L standard monotub (the next step up)
| Item | Code | Qty | Price (May 2026) |
|---|---|---|---|
| SAMLA 45 L combo — box + lid + clip-locks | IKEA 496.196.51 | 1 | € 9.48 |
| MMS | 6 | ± € 25 | |
| MMS | 1 | ± € 8 | |
(also for grain jars) |
MMS | 1 | ± € 5 |
(optional, advanced) |
MMS | 0 or 1 | ± € 4 |
| Total (without injection port) | — | — | ± € 47 |
If you ever need to replace a single 45 L component — say the lid cracked or you over-drilled it — you can buy the box (301.029.74, € 5.99) or the lid (704.550.87, € 3.00) on its own. Clip-locks are also sold separately as a 4-pack (705.906.03, € 0.50). Therefore there is no waste even if something breaks years from now.
What comes next
Your DIY IKEA monotub is now ready. Before you ever fill it, our guide on how to sterilise your cultivation materials covers what to clean and how — and walks through the grain-jar workflow where the cobalt drill bit comes back into play. It also pays to know what contamination looks like before you open a populated tub the first time. The build is straightforward, but cultivation hygiene is where most beginners lose tubs unnecessarily.
The substrate inside the tub eventually colonises with what mycelium actually is, and that mycelium needs the airflow your six filters provide. For broader advice once the tub is in use, our extra tips for tub-based cultivation are a useful next read.
The cost of a finished DIY IKEA monotub
A 45 L SAMLA combo (article 496.196.51) costs € 9.48 at IKEA Nederland in May 2026. Add six 65 mm monotub filters at roughly € 25, a Meliseptol® spray at € 8, and a cobalt pilot bit at € 5, and the finished DIY IKEA monotub lands around € 47. By contrast, the cheapest pre-drilled European kits we have seen start at € 55 to € 80 — and those still require you to buy filters separately.
For first-time builders the savings are not the only argument. Building your own teaches you exactly where the air moves, why the filters sit where they sit, and what each component does. As a result, when something goes wrong later, you already understand the system you are troubleshooting.
Ready to build your own? Grab the SAMLA 45 L combo (article 496.196.51) at IKEA, then add the six 65 mm side filters, the Meliseptol® spray and the cobalt pilot bit below. Skip the injection port unless you specifically need it.
Build kit — everything you need for the tub itself
Standard Monotub-Filter 65 mm — Selbstklebend 12er-Pack
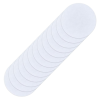 Das 65 mm Pad ist die Standard-Größe der Monotub-Tek-Welt — das Arbeitsp...
Shoebox Monotub-Filter 38 mm — Selbstklebend 12er-Pack
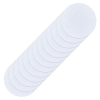 Zwölf 38 mm selbstklebende Filterpads — die Shoebox-Größe in unserer Mon...
Bohrer für Substrat-Glasdeckel
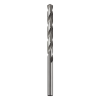 7,1 mm Cobalt-Stahlbohrer für saubere, exakte Löcher in Substrat-Glas...
Selbstklebende Selbstheilende Injektionsports 18 mm | 50 Stück
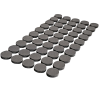 50er-Pack selbstheilende selbstklebende Injektionsports für sichere, sterile ...
This guide covers the construction of a DIY cultivation chamber only. It does not provide medical, legal or therapeutic advice. You are responsible for understanding the rules that apply where you live, for handling tools and materials safely, and for the choices you make once the tub is finished. Drilling generates dust and fumes — ventilate the work area, wear a mask, and keep children and pets out of reach while you build. IKEA prices listed in this guide were verified at IKEA Nederland in May 2026 and will drift over time — always check the current price at the IKEA counter or at ikea.com.


May 1, 2026