O seu carrinho de compras está vazio
How to Make Liquid Culture for Magic Mushrooms: Complete Guide (2026 Update)
Posted under: Growing & Cultivation
A complete guide to making liquid culture for magic mushrooms — recipe, sterilisation, inoculation, contamination checks, and using LC to inoculate grain (2026 Update)
In this guide: Learn how to make liquid culture for magic mushrooms — including the honey water and light malt extract recipes, pressure cooker sterilisation, spore inoculation, and how to use your finished LC to inoculate grain jars.
Liquid culture speeds up colonisation and allows you to scale up from a single spore vial into a large number of grain jars with minimal additional material.
Liquid culture — often abbreviated to LC — is one of the most useful techniques in mushroom cultivation. Instead of inoculating grain jars directly with spore solution, you first grow mycelium in a sterile liquid nutrient broth. The result is a jar of living, active mycelium suspended in solution. When you draw this into a syringe and use it to inoculate grain, colonisation is dramatically faster than with spores alone, because you are introducing already-germinated mycelium rather than dormant spores.
For cultivators who work with several jars at a time, liquid culture is an efficient way to stretch a single spore vial or syringe into enough inoculum for a large batch. Understanding what liquid culture is and how it works is covered in our companion post on what a liquid culture syringe is. This guide focuses specifically on the practical process of making it from scratch.
What Is Liquid Culture?
Liquid culture is a nutrient-rich water solution in which fungal mycelium grows and multiplies. The nutrients provide energy for mycelium development, while the water keeps the growing environment fluid. This fluid state is what makes LC so useful — mycelium in liquid can be drawn into a syringe and distributed evenly across multiple substrates, unlike a colonised grain jar which must be broken up and mixed.
A healthy liquid culture appears as a clear or lightly coloured liquid containing white, fluffy, web-like mycelium strands. When the jar is swirled, the mycelium disperses through the liquid. A contaminated culture, by contrast, shows discolouration — green, black, yellow, or pink — and often has a cloudy or murky appearance rather than the characteristic white strands. Contamination in LC spreads quickly because the warm, nutrient-rich broth is an ideal growing environment for competing organisms.
Mycelium in liquid culture is genetically identical to the mushrooms it came from. Therefore, LC made from a specific strain will produce mushrooms with the same characteristics as the parent strain, assuming clean technique throughout the process.
Liquid Culture Recipes
The nutrient solution must provide enough energy for mycelium to grow but not so much sugar that it encourages bacterial contamination before the mycelium can establish itself. Two recipes are most widely used by home cultivators.
Honey Water (Simple and Accessible)
Honey water is the easiest LC recipe and requires nothing beyond what most people already have at home. The formula is simple: 4% honey by volume in distilled water. For a 250 ml jar, dissolve 10 g of honey in distilled water to make 250 ml total. Raw honey is preferred by many cultivators because it contains naturally occurring antimicrobial compounds, though standard supermarket honey also works. The key is to use distilled or boiled water rather than tap water, and to mix thoroughly so the honey is fully dissolved before sterilisation.
Light Malt Extract (LME)
Light malt extract is a brewing supply ingredient that provides a more complete nutrient profile than honey water. The standard ratio is 2–4% LME by weight dissolved in distilled water. LME produces reliable, vigorous mycelium growth and is the preferred choice for cultivators who make LC regularly. It is available from homebrew suppliers and online. Our light malt extract powder is a convenient option specifically suitable for mushroom cultivation work.
Both recipes are sterilised the same way, and both produce good results when technique is clean. Honey water is the better starting point if you are making LC for the first time. LME is the preferred choice once you have the process down and want consistent, fast colonisation results.
Tip: Keep the nutrient concentration low rather than high. Rich solutions encourage bacterial growth more than they accelerate mycelium development. A 4% honey or 2–3% LME solution is sufficient — more is not better.
Equipment You Need
| Item | Notes |
|---|---|
| Glass jar with lid (250–500 ml) | A wide-mouth mason jar works well; glass jar with screw cap is ideal |
| Self-healing injection port | Silicone or RTV-based port installed in the lid; allows syringe access without opening |
| Polyfill or micropore tape | For a gas exchange port — allows CO₂ out and air in while filtering contaminants |
| Pressure cooker | For sterilising the nutrient solution; essential for clean LC production |
| Distilled water | For the nutrient solution base |
| Honey or light malt extract | The nutrient source for mycelium growth |
| Spore syringe or spore vial with syringe | For inoculating the sterile broth |
| Isopropyl alcohol (70%) | For surface decontamination |
| Gloves and face mask | Essential for all steps involving open transfers |
| Stir bar or sterile wire | For agitating the LC during incubation to promote even growth |
Step-by-Step: How to Make Liquid Culture
1
Prepare the Liquid Culture Jar Lid
Prepare the Liquid Culture Jar Lid
The jar lid needs two modifications: an injection port for syringe access, and a gas exchange port to allow CO₂ to escape during mycelium growth. For the injection port, drill or punch a hole in the lid and fill it with high-temperature silicone or a commercial self-healing port. For the gas exchange port, drill a second hole and fill it with a plug of polyfill fibre, which allows air exchange while filtering out contaminants. Seal around both ports with high-temperature silicone to ensure no gaps. Allow all silicone to cure fully before use.
2
Mix the Nutrient Solution
Mix the Nutrient Solution
Dissolve your chosen nutrient — honey or LME — in distilled water at the correct ratio. Stir thoroughly until fully dissolved. Pour the solution into the jar to about two-thirds full, which leaves headspace to prevent liquid from being forced into the injection port during pressure cooking. Seal the lid loosely — it should be finger-tight, not locked down — to allow steam to escape during sterilisation.
3
Sterilise in the Pressure Cooker
Sterilise in the Pressure Cooker
Place the jar in the pressure cooker with enough water in the base for the full sterilisation run. Pressure cook at 15 PSI for 20–30 minutes. This is sufficient to kill all bacteria, mould spores, and other contaminants in the liquid. After sterilisation, allow the pressure cooker to depressurise naturally — do not force-release the pressure, as rapid depressurisation can cause the liquid to boil and overflow inside the jar. Once the cooker is at ambient pressure, remove the jar and allow it to cool completely to room temperature before proceeding.
Our guide on how to use a pressure cooker for mushroom substrate covers the process in detail and is worth reading before your first pressure cooking session.
4
Inoculate with Spores or Existing Mycelium
Inoculate with Spores or Existing Mycelium
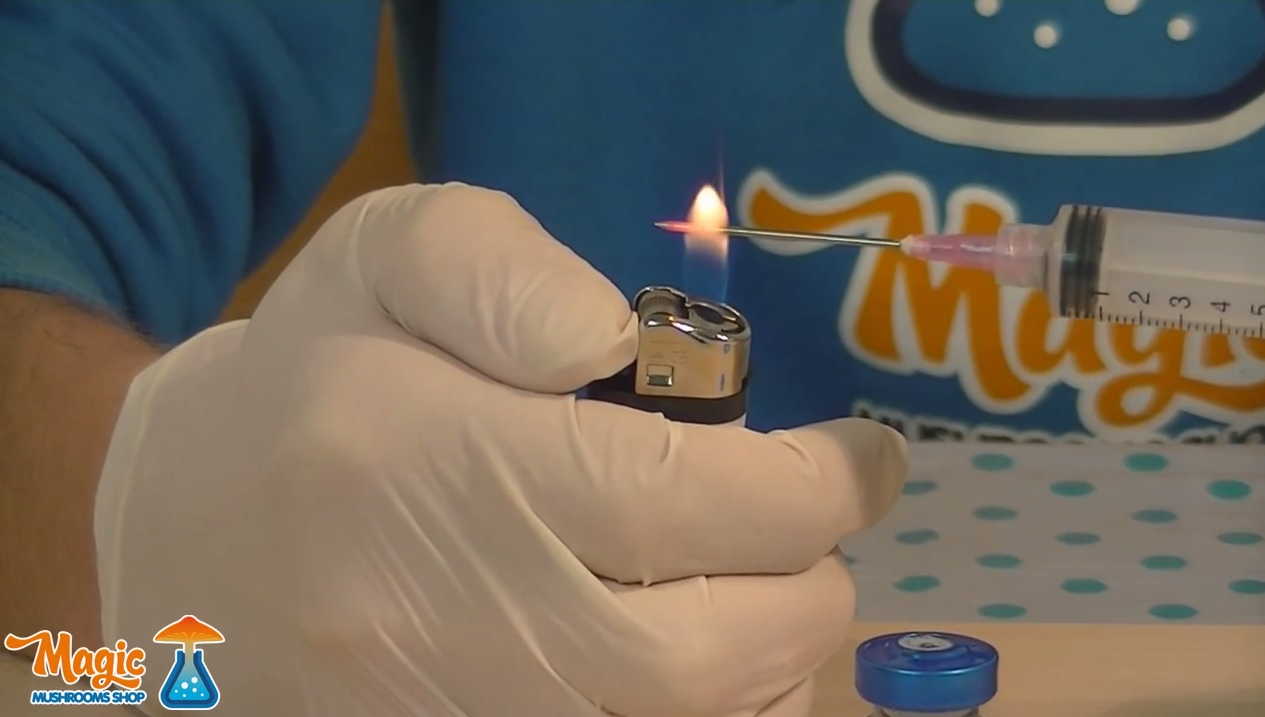
Once the jar has cooled to room temperature, inoculate it through the injection port using a flame-sterilised syringe and needle. Work inside a still-air box or in the cleanest environment available. Inject 1–3 ml of spore solution or LC from an existing clean culture. Swirl the jar gently after injection to distribute the inoculum throughout the broth. Then tighten the lid fully.
If you are inoculating from a spore vial, warm and shake the vial as described in our guide on how to use a magic mushroom spore vial before drawing from it. The technique for flame sterilisation and injection is the same for both uses.
5
Incubate at Room Temperature
Incubate at Room Temperature
Place the inoculated jar in a dark location at 21–24°C. Mycelium will begin to grow from the inoculation points within a few days and gradually spread through the liquid. To promote even colonisation and prevent clumping, swirl the jar gently every day or two. If you have added a magnetic stir bar, you can place the jar on a stir plate set to a low speed for continuous gentle agitation — this produces the most even, finely distributed mycelium growth.
Colonisation typically takes 7–14 days depending on strain, temperature, and nutrient concentration. Do not rush this step — wait until you have good mycelium development before using the LC to inoculate grain.
6
Check for Contamination
Check for Contamination
Before using your LC, hold the jar up to the light and inspect it carefully. Healthy liquid culture shows clear or slightly amber liquid with white, fibrous mycelium strands distributed throughout. Any green, black, pink, or orange colouration indicates contamination. A foul smell when you open the jar is also a clear sign of bacterial contamination. Contaminated LC should be discarded — do not use it to inoculate grain jars. Introducing contaminated LC to a batch will ruin every jar in the batch.
Important: When in doubt, throw it out. A contaminated LC is not salvageable. It is far better to discard one jar of LC and start fresh than to lose an entire batch of grain jars to contamination. Our guide on identifying and dealing with contamination explains the visual signs to watch for.
Using Liquid Culture to Inoculate Grain
Once your LC is healthy and well-developed, draw it into a sterile syringe through the injection port. Work in a still-air box or flow hood. For grain jar inoculation, 1–3 ml of LC is typically sufficient per jar — because you are introducing living mycelium rather than dormant spores, colonisation is much faster and the volume needed is lower.
Inject at 2–4 points around the jar to give mycelium multiple starting locations. After inoculation, place the jars at 21–24°C in a dark location and check regularly. Grain jars inoculated with healthy LC often begin showing visible colonisation within 5–7 days, compared to 10–14 days for spore inoculation. This speed advantage is the main practical benefit of liquid culture over direct spore inoculation.
If you want to store LC for later use, it can be refrigerated at 2–8°C for up to 3–4 months. Cold temperatures slow mycelium metabolism significantly but do not kill it. Bring the jar back to room temperature and swirl it before drawing from a refrigerated culture.
Troubleshooting Liquid Culture Problems
No Growth After Two Weeks
If you see no visible mycelium growth after two weeks at the correct temperature, the most likely causes are that the spores were damaged during sterilisation (water was still hot when inoculated), or that the injection port was not sealed properly and the broth cooled in a contaminated environment before inoculation. Check your process for each of these points. Also confirm that the lid was tightened after inoculation — an unsealed jar at incubation temperature is highly vulnerable to airborne contamination.
Mycelium Clumps Rather Than Spreading
Dense clumping is common without agitation. The solution is simply to swirl the jar daily, or to use a magnetic stir plate. Clumped mycelium is not contaminated — it is just less convenient to draw evenly into a syringe. Breaking up the clumps by vigorous swirling before drawing is usually sufficient. See our detailed article on what liquid culture is and how it works for more on the growth patterns of mycelium in liquid.
LC Looks Good but Grain Jars Are Not Colonising
If your LC appears healthy but grain jars show no colonisation, the most likely cause is that the grain itself was not properly sterilised, or that the LC was introduced too soon after sterilisation before the grain cooled fully. Hot grain damages mycelium on contact. Always confirm grain jars have reached room temperature before inoculation. Our guide on sterilising cultivation materials covers grain sterilisation in full detail. Additionally, check that the grain moisture content is correct — over-wet grain becomes anaerobic and is hostile to mycelium even with clean inoculation.
Agar vs. Liquid Culture: Which Is Better?
Liquid culture and agar plates serve different purposes in advanced cultivation. Agar is better for isolating specific mycelium strains and testing for contamination before scaling up, because you can see exactly what is growing on the surface of the plate. Liquid culture is better for rapid scaling — once you have a clean, isolated strain on agar, transferring it to LC gives you large volumes of inoculum quickly. The two techniques complement each other rather than competing.
If you want to learn how to use agar alongside liquid culture as part of a clean cultivation workflow, see our guide on making agar plates for magic mushrooms.
Ready to make your first liquid culture? Get everything you need — light malt extract powder and glass jars with screw caps — from Magic Mushrooms Shop.
Note: If you are suffering from a mental illness and are curious about using psilocybin or any other psychedelic therapy, please consult one of the relevant medical authorities first. Do not self-prescribe — it is vital to have the right support and guidance when using psychedelics as medicine.
June 13, 2019