Votre panier est vide.
How to Use a Magic Mushroom Spore Vial: Complete Guide (2026 Update)
Publié sous: Growing & Cultivation

Everything you need to know about using a magic mushroom spore vial — what's inside, how to shake it, inoculation technique, and storage (2026 Update)
In this guide: Learn how to use a magic mushroom spore vial correctly — from shaking and preparing the vial to inoculating grain jars and storing what remains.
Whether this is your first spore vial or you want to refine your technique, this guide covers every step with clear, practical instructions.
A magic mushroom spore vial is one of the most practical ways to store and use mushroom genetics. Unlike a spore syringe, which is a single-use tool, a vial contains a sealed supply of spore solution that can be drawn from multiple times using a fresh syringe and needle. This makes vials especially economical for cultivators who work with multiple substrate jars, because one vial can inoculate several containers without running out of material.
The spore vial format is also convenient because the spores are already in suspension — you do not need to hydrate them or prepare them before use. However, there are specific handling techniques that make a real difference in whether your inoculations succeed or fail. This guide walks through each of them.
What Is in a Spore Vial?
A typical magic mushroom spore vial contains 10–20 ml of sterile water with mushroom spores suspended throughout the solution. The vial is sealed with a self-healing injection port — usually a thick rubber or silicone septum — that allows a needle to pass through without permanently opening the vial. This means the vial can be accessed multiple times while remaining largely sealed against contaminants.
The spores themselves are not yet germinated. They are dormant cells waiting for the right conditions — moisture, warmth, and nutrients — to begin producing mycelium. Inside the sterile water, they remain stable for months when the vial is kept refrigerated. Because spores do not contain psilocybin (the compound is produced only after germination and mycelium development), spore vials fall into a different legal category than the mushrooms themselves in many countries. Always check your local laws before purchasing or using spore vials.
For a complete comparison of the different spore formats available — vials, syringes, and prints — and when to use each one, see our guide on how to use a spore syringe, which covers the broader context of spore-based cultivation.
What You Need
| Item | Notes |
|---|---|
| Magic mushroom spore vial | Refrigerated until use; brought to room temperature before opening |
| Sterile syringe and needles (18–21 gauge) | One needle per inoculation point; do not reuse needles between jars |
| Alcohol lamp or lighter | For flame-sterilising the needle before and between uses |
| Alcohol swabs or isopropyl alcohol (70%) | For wiping the vial septum and your gloves |
| Latex or nitrile gloves | Worn throughout the entire process |
| Face mask | Prevents airborne contamination from breathing |
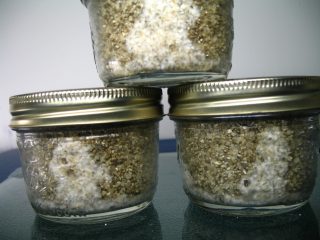
| Sterile grain jars or other substrate | Pre-sterilised and cooled; ready to receive inoculation |
| Still-air box or flow hood (optional) | Strongly recommended for best results |
Step-by-Step: How to Use a Magic Mushroom Spore Vial
1
Bring the Vial to Room Temperature
Bring the Vial to Room Temperature
Remove the spore vial from the refrigerator and allow it to warm up to room temperature before use. This typically takes 30–60 minutes. Introducing a cold needle into a warm substrate jar can cause moisture condensation, and cold spores are also slightly less active than those at room temperature. Warming the vial is a small step, but it is worth doing consistently.
2
Shake the Vial Thoroughly
Shake the Vial Thoroughly
Before drawing any solution, shake the vial vigorously for 15–30 seconds. Spores settle to the bottom during refrigerator storage, and you need them evenly distributed throughout the liquid before use. A well-shaken vial should appear uniformly cloudy or slightly coloured rather than clear on top with a sediment at the bottom. If you can see visible clumps after shaking, shake again until they break up.
3
Wipe the Septum with Isopropyl Alcohol
Wipe the Septum with Isopropyl Alcohol
Wipe the rubber septum of the vial with a clean alcohol swab or a piece of tissue soaked in 70% isopropyl alcohol. Allow it to dry for 30 seconds — you want the surface decontaminated, but you do not want to inject alcohol into the vial when you insert the needle. This step is simple but important: the septum is the point where contamination is most likely to enter.
4
Flame-Sterilise the Needle
Flame-Sterilise the Needle
Hold the needle in the flame of an alcohol lamp or lighter until it glows red at the tip and along the shaft. Allow it to cool for 15–20 seconds — a needle that is still hot when it enters the septum can damage the rubber and allow gaps to form. The flame also burns off any alcohol or debris on the needle surface. This step must be repeated every time you use the needle on a new jar.
5
Draw the Spore Solution into the Syringe
Draw the Spore Solution into the Syringe
Insert the cooled, flame-sterilised needle through the septum of the vial at a slight angle. Draw back the plunger slowly to fill the syringe with spore solution. For standard grain jar inoculation, 1–2 ml per inoculation point is sufficient — you do not need a large volume. Pull the needle out smoothly and keep the tip pointing upward to prevent dripping. If you are inoculating multiple jars, you can draw a larger volume at once and then distribute it across several jars without returning to the vial between each one, which reduces the number of times you penetrate the septum.
6
Inoculate the Substrate
Inoculate the Substrate
Work inside a still-air box or flow hood if possible. Inject the spore solution through the self-healing port of your grain jar or substrate container. Distribute the inoculation points evenly — typically 2–4 injection points around the circumference of the jar rather than one central point. This gives mycelium multiple starting locations and leads to faster, more even colonisation. Inject slowly and steadily to avoid creating air pressure that forces solution back out.
If you are new to grain jar inoculation, our guide on PF Tek cultivation covers the substrate preparation and colonisation process in detail.
7
Flame-Sterilise Between Jars
Flame-Sterilise Between Jars
Before moving to the next jar, flame-sterilise the needle again and allow it to cool. Never use the same unsterilised needle on two different jars — if one jar has background contamination, you will transfer it to the next. This step takes only a few seconds and protects your entire batch.
8
Seal and Return the Vial to the Refrigerator
Seal and Return the Vial to the Refrigerator
After inoculating all your jars, the vial can be returned to the refrigerator if solution remains. Wipe the septum once more with an alcohol swab and store the vial upright in a zip-lock bag in the refrigerator. Most vials remain usable for 3–6 months when stored correctly, though viability decreases over time. Note the date on the vial label so you can track its age.
After Inoculation: What to Expect
After inoculating grain jars, move them to a dark location at 21–24°C. This is the ideal colonisation temperature range for most Psilocybe cubensis strains. Mycelium should begin to appear at the inoculation points within 7–14 days as small white patches, gradually expanding to fill the jar. The colonisation timeline depends on strain, temperature, grain type, and the density of spores in your solution.
During colonisation, inspect jars every few days but avoid opening them. Look for the white, fluffy appearance of healthy mycelium. Contamination — green, black, yellow, or pink colouration — is most likely to appear early, within the first week. If you see contamination, isolate the affected jar immediately to prevent spores from spreading. Our guide on dealing with grow kit contamination covers the key signs and what to do.
Tip: Healthy mycelium growing from Psilocybe spores sometimes shows blue bruising where the substrate is disturbed or where mycelium is dense. This blue colour is a normal biological response and is not contamination.
Popular Spore Vial Strains
Every Psilocybe cubensis strain has its own growth characteristics, colonisation speed, and appearance. Below are some of the most popular spore vials available in our shop — all produced under sterile conditions and containing 10 ml of spore solution.
| Strain | Difficulty | Characteristics |
|---|---|---|
| Golden Teacher | Easy | Classic beginner strain; slow coloniser with rizomorphic mycelium; flush after flush on BRF substrate |
| B+ | Easy | Highly resilient all-rounder; grows at cooler temperatures; produces large mushrooms |
| McKennaii | Easy | Named after Terence McKenna; popular for its reported potency; good fruiter on multiple substrates |
| Colombian | Easy | Fast coloniser from South America; reliable yields with meaty mushrooms |
| Costa Rica | Moderate | For experienced growers; large flushes of medium-sized mushrooms; unique appearance each flush |
| Treasure Coast | Easy | Fast coloniser from Florida; multiple quick flushes; occasionally produces albino mushrooms |
| PES Amazonian | Easy | Known for speed and size; meaty mushrooms with interesting shapes; large flushes |
| Hawaiian PES | Easy | Fast fruiter; medium to big mushrooms with meaty stems; warm-climate genetics |
| Red Boy | Moderate | Unique red-coloured spores; big wide caps on meaty stems; slower grower but rewarding |
Save on multi-vial orders: Our Cubensis Spore Vial Pack lets you pick 5 vials and pay for only 4 — all strain combinations are possible.
Spore Vial vs. Spore Syringe: Key Differences
Both formats contain spores in sterile water, but the vial format offers some practical advantages. A vial with a self-healing septum can be accessed multiple times with fresh needles, whereas a syringe is typically drawn and used in one session. This makes vials more economical for larger-scale cultivation where multiple jars are being inoculated in different sessions.
On the other hand, a syringe is a more portable and self-contained format. The spore solution is already in the delivery vessel, so no additional syringe is needed. For small-scale use with just one or two jars, a syringe is often the simpler option. Both formats require the same sterile technique — the fundamental principles of flame sterilisation, alcohol wiping, and clean handling apply equally to both.
For guidance on using a spore syringe format, see our dedicated article on how to use a spore print, which also covers the relationship between prints, syringes, and vials in the broader cultivation workflow.
Storing Your Spore Vial
Proper storage is the most important factor in maintaining spore viability over time. Always store spore vials in the refrigerator at 2–8°C. At this temperature, spores remain dormant and stable. Room temperature storage will shorten the viable life of the vial significantly, and any temperature above 30°C risks damaging the spores.
Keep the vial sealed and upright. Horizontal storage can cause the solution to pool against the septum, increasing the moisture exposure of the rubber seal over time. Avoid freezing — ice crystal formation can rupture spore cells and reduce viability.
Before each use, always shake the vial and check for discolouration that was not present before. Green, pink, or orange tints are signs of contamination and mean the vial should be discarded. A small amount of brownish cloudiness is normal — that is the spores themselves.
For sterilisation best practices that apply to all lab work including vial-based inoculation, our guide on sterilising cultivation materials is an essential reference.
Ready to inoculate? Browse our magic mushroom spore vials — a wide range of strains, prepared under sterile conditions for research and microscopy.
Note: If you are suffering from a mental illness and are curious about using psilocybin or any other psychedelic therapy, please consult one of the relevant medical authorities first. Do not self-prescribe — it is vital to have the right support and guidance when using psychedelics as medicine.
Février 6, 2014