Votre panier est vide.
FreshMushrooms Grow Kit Tips: Soaking, Misting, FAE & Second Flush (2026 Update)
Publié sous: Growing & Cultivation
Advanced Tips for Getting the Most from Your FreshMushrooms Grow Kit — Soaking, Misting, FAE, Temperature, and Second Flushes (2026 Update)
FreshMushrooms grow kits are known for being fast and straightforward to use. However, even an easy kit benefits from a little extra attention. Knowing the specific FreshMushrooms grow kit tips that work for this brand — from the initial soak to the conditions between flushes — can mean the difference between a single average flush and several strong rounds of growth. This guide covers everything growers commonly ask about after their first experience with a FreshMushrooms kit.
In this guide: Practical FreshMushrooms grow kit tips on soaking, misting frequency, fresh air exchange, temperature management, harvesting at the right moment, and how to get a strong second flush.
These tips apply to the full FreshMushrooms 100% mycelium kit range available at Magic-Mushrooms-Shop.com.
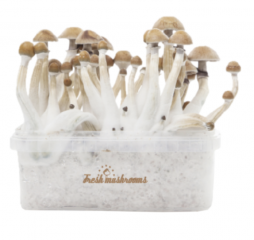
What Makes FreshMushrooms Kits Different
FreshMushrooms kits use 100% colonised mycelium — no loose substrate to mix or prepare. The entire block is ready to fruit straight out of the bag. This makes the kit very beginner-friendly, but it also means that the mycelium is already at a mature stage when you receive it. Because of this, the kit can respond faster than you might expect, and it also means that any environmental shortcomings — too dry, too warm, too little fresh air — will show up as problems within just a day or two.
Understanding this helps you stay one step ahead rather than reacting to problems after they develop.
FreshMushrooms Grow Kit Tips: Soaking the Kit
The first and most important FreshMushrooms grow kit tip is to soak the substrate block before your first grow, and again between flushes. The mycelium needs adequate moisture to fruit well, and shipping and storage can dry out the surface slightly even inside sealed packaging.
How to Soak Before the First Flush
Open the outer box and remove the grow bag containing the substrate block. Do not open the bag yet. Fill the bag with clean, room-temperature water — enough to submerge or thoroughly wet the top surface of the block. Fold the bag closed loosely and allow it to soak for 8–12 hours, or overnight. After soaking, drain any excess water from the bag completely. The block should feel heavier and slightly swollen. Now you are ready to set up the fruiting environment.
Tip: Use clean tap water or filtered water at room temperature (around 20°C). Cold water from the fridge can slow down the mycelium and delay pinning. Boiled water that has been allowed to cool also works well.
Soaking Between Flushes
After your first harvest, the block will have lost a significant amount of moisture. Rehydration is essential before the next flush. Remove the block from the grow bag, place it in a clean container, and submerge it in cold water for 12 hours. Some growers prefer to simply fill the grow bag with water and soak the block in situ — both methods work. After soaking, drain thoroughly and return to the grow bag for the next fruiting cycle. The second soak can use cold water, as a brief cold-shock can actually stimulate pinning.
Misting: How Often and How Much
Misting keeps humidity high inside the grow bag and prevents the surface of the block from drying out between pins. However, over-misting is a common mistake that leads to pooling water, bacterial contamination, and soft, misshapen mushrooms.
The right approach with FreshMushrooms kits is to mist lightly once or twice a day. Use a clean spray bottle set to a fine mist — aim the spray at the inside walls of the grow bag rather than directly onto the block surface. This raises humidity without saturating the substrate. After misting, allow the excess moisture to settle for a moment before folding the bag closed again.
You can also lightly mist the surface of the block itself, but do so sparingly. A damp surface is ideal; a wet, dripping surface is not. If you notice water pooling at the bottom of the bag, tip it out and reduce your misting frequency.
Fresh Air Exchange (FAE): The Most Overlooked Factor
Many first-time growers focus on temperature and misting but neglect fresh air exchange. This is one of the most important FreshMushrooms grow kit tips to understand: mushrooms need fresh air. As they grow, they produce CO₂. If CO₂ builds up inside the sealed bag, mushrooms develop long, thin stems and small, pale caps — a condition called "leggy growth" that indicates CO₂ stress.
The solution is simple. When you mist the kit, open the top of the bag for 10–15 seconds and fan gently with the bag itself or with your hand before resealing. Do this at least once a day, twice if possible. This brief exchange of air is enough to keep CO₂ levels in check and encourage normal cap and stem development. For more on the relationship between air and mushroom development, our post on light and air for grow kits covers both variables together.
Tip: The fold at the top of the grow bag is not a hermetic seal — it allows a small amount of passive air exchange. However, active fanning during misting makes a noticeable difference to stem and cap formation.
Temperature: Staying in the Sweet Spot
Temperature is the most consistent variable in mushroom cultivation, and FreshMushrooms kits are no exception. Most cubensis strains fruit best between 23°C and 26°C. Below 20°C, the mycelium will slow significantly and pins may take much longer to form or may not appear at all. Above 28°C, the risk of contamination increases and the mycelium can become stressed.
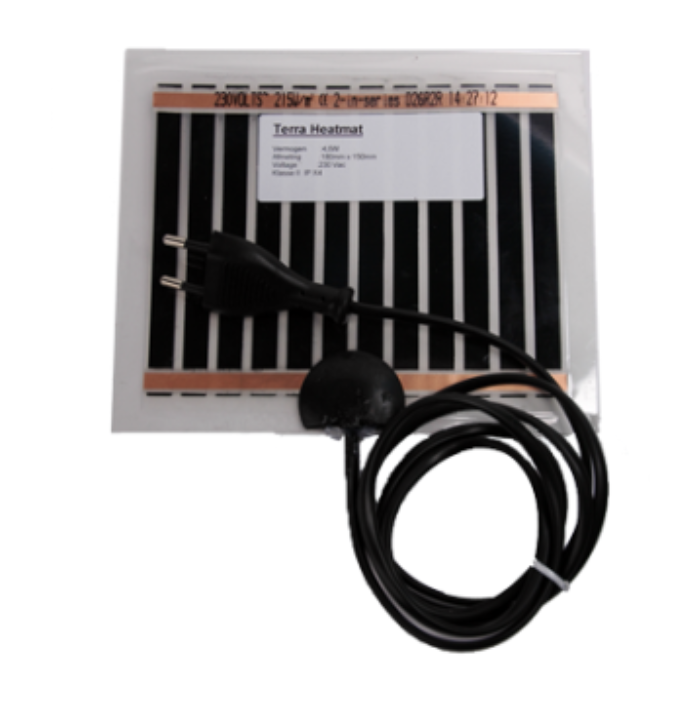
Most homes in the Netherlands and wider Europe are within the right range during spring and summer. In colder months, you may need to use a heat mat to bring the kit up to temperature. Our guide on the best temperature for growing magic mushrooms explains the full range and how different strains respond. If you are using a heat mat, see also our post on how to use a thermo mat without damaging your kit.
Avoid placing the kit near a window where direct sunlight can rapidly overheat the bag. Indirect natural light or a standard room light is sufficient for orientation — mushrooms do not need intense light to grow.
Pinning: What to Expect and How to Encourage It
After setting up the kit and allowing the first soak to drain, pins — the tiny white nodules that will develop into mushrooms — typically appear within 5–14 days depending on temperature and strain. With FreshMushrooms kits, first pins often appear relatively quickly compared to other brands, as the mycelium is already fully colonised and mature.
If no pins appear after 14 days, do not panic. First, check temperature. If the kit is below 20°C, warming it up is the priority. Second, try a cold-shock: place the kit in the refrigerator at around 4°C for 12 hours, then return it to room temperature. This temperature drop mimics a natural seasonal shift and can trigger pinning in a kit that has stalled. Third, review your FAE routine — insufficient fresh air is a very common cause of delayed or absent pinning.
Harvesting: Timing and Technique for FreshMushrooms Kits
The harvest timing principles for FreshMushrooms kits are the same as for any cubensis grow. Pick just before or as the veil — the membrane connecting the cap edge to the stem — begins to tear. Caps should still be dome-shaped, not fully open and flat. For a full walkthrough of picking technique, see our guide on how to pick magic mushrooms from your grow kit.
One specific FreshMushrooms grow kit tip for harvest: because these kits tend to produce large, dense clusters, it can be tempting to pick individual mushrooms from a cluster as they mature. In practice, it is usually better to wait until most of the cluster is ready and harvest the whole group at once. Repeatedly disturbing a cluster to pick individual mushrooms can damage nearby pins and expose the substrate surface unnecessarily.
Getting a Strong Second Flush
The second flush is often the strongest from a FreshMushrooms kit, provided the block is properly rehydrated. After your first harvest, take the following steps to set up for flush two.
1
Clean the Surface
Clean the Surface
Remove all mushroom stumps and any remaining aborts with clean hands or a clean implement. Leaving stumps in place is the most common reason second flushes disappoint — rotting organic matter invites contamination. For contamination prevention guidance, see our post on magic mushroom grow kit contamination.
2
Soak for 12 Hours
Soak for 12 Hours
As described in the soaking section above, rehydrate the block fully. The second soak can use cold water, as the cold-shock effect often accelerates pinning in the next cycle. After draining, return the block to the grow bag with the top folded loosely.
3
Resume Normal Care
Resume Normal Care
Return the kit to its fruiting location. Continue your misting and FAE routine as before. Pins for the second flush typically appear within 5–10 days of the rehydration soak.
4
Repeat for Further Flushes
Repeat for Further Flushes
The same process — clean, soak, drain, fruit — can be repeated for third and fourth flushes. Productivity gradually decreases with each cycle as the substrate is depleted, but many growers successfully achieve three or more strong harvests from a single FreshMushrooms kit.
Quick-Reference Summary Table
| Soak duration (first) | 8–12 hours, room-temperature water |
| Soak between flushes | 12 hours, cold water (cold-shock effect) |
| Misting frequency | 1–2 times per day, lightly on bag walls |
| FAE | Fan 10–15 seconds each time you mist |
| Fruiting temperature | 23–26°C |
| Typical time to first pins | 5–14 days after setup |
| Harvest trigger | Veil intact, caps still dome-shaped |
Ready to try a FreshMushrooms kit for yourself? Browse the full range at Magic-Mushrooms-Shop.com and find the strain that suits you.
Note: If you are suffering from a mental illness and are curious about using psilocybin or any other psychedelic therapy, please consult one of the relevant medical authorities first. Do not self-prescribe — it is vital to have the right support and guidance when using psychedelics as medicine.
Mars 12, 2022