O seu carrinho de compras está vazio
How to Use a Mushroom Spore Print: The Complete Guide
Posted under: Growing & Cultivation
The complete guide to turning a single mushroom spore print into fully colonised grain spawn -- with a shopping list of everything you need.
You have got a mushroom spore print in your hands -- now what?
You are ready to move beyond grow kits and take full control of your cultivation. In fact, learning how to use a spore print lets you germinate spores, isolate strong genetics, create liquid culture, and colonise your own grain spawn -- all from a single print that can last years.
In this guide, you will move through each stage step by step and see exactly which supplies you need at every point, so you always know what to do next.
Why Start with a Mushroom Spore Print?
To begin with, a mushroom spore print is a collection of millions of microscopic spores deposited onto aluminium foil or between two glass plates from a mature mushroom cap. Because of this, it contains all the genetic material needed to grow new mushrooms.
Compared to spore syringes or spore vials, a mushroom spore print gives you maximum versatility:
Moreover, our
are laboratory-quality, prepared from fresh specimens, and available in 15+ strains including Golden Teacher, B+, McKennaii, Mazatapec, and many more.
The 4-Stage Roadmap for Using a Spore Print
Understanding how to use a spore print becomes simple when you break it into four stages. Specifically, each stage builds on the previous one, so your skills and confidence grow step by step.
From here, let us walk through each stage and everything you need along the way.
Stage 1: From Mushroom Spore Print to Agar Plate
This is where it all begins. First, you transfer a tiny amount of spores from your mushroom spore print onto a nutrient-rich agar plate. As a result, the spores germinate and grow into visible mycelium within 5 to 7 days -- and you can actually see the culture appear before your eyes.
Supplies needed for Stage 1
| Supply | Purpose |
|---|---|
| Your genetic starting material | |
| Container for your agar plates | |
+ |
Nutrient medium for mycelium |
| Scraping spores from the print | |
| Alternative tool for spore transfer | |
| Sealing plates after inoculation | |
| Prevent contamination | |
| Sterilise surfaces, tools, packaging | |
| Reduce airborne contamination | |
| Pressure cooker (15 PSI) | Sterilise agar medium |
Preparing your agar plates
A simple and proven recipe for malt extract agar (MEA) looks like this:
To begin, mix the ingredients in an Erlenmeyer flask. Next, sterilise at 15 PSI for 20 to 30 minutes in your pressure cooker. Finally, pour into your sterile petri dishes inside a clean workspace and let them cool and solidify completely before use.
For a complete walkthrough — including contamination identification, mycelium selection, and advanced tips — see our full guide on how to make agar plates for magic mushrooms.
Pro tip: Work in a still air box (SAB) -- a large transparent plastic tub with two arm holes cut in the side. In addition, spray the inside with 70% isopropyl alcohol before every session, since this simple habit dramatically reduces contamination risk.
How to use a spore print on agar
1
Prepare your workspace
Prepare your workspace
First, wipe down the inside of your SAB and the outside of your mushroom spore print packaging with an alcohol prep. After that, put on sterile gloves and a face mask to add an extra layer of protection.
2
Sterilise your tool
Sterilise your tool
Next, flame-sterilise your scalpel or inoculation loop until glowing red. Allow it to cool by briefly touching it to the agar surface at the very edge of the plate.
3
Scrape spores from the print
Scrape spores from the print
Now gently scrape a tiny amount of spores from the foil of your mushroom spore print. A barely visible dusting is more than enough for one plate, so do not overdo it.
4
Inoculate the plate
Inoculate the plate
After scraping, carefully streak the spores across the agar surface in a zig-zag pattern. This spreads individual spores across the plate for better germination.
5
Seal and label
Seal and label
When you are finished, wrap the plate with Parafilm to seal it. Label with the strain name and today's date so you can track every plate later.
6
Incubate
Incubate
Finally, store the plate at 23 to 27 degrees Celsius in a dark place. Within 3 to 7 days, white thread-like mycelium will spread across the agar -- which means your culture is coming to life.
Stage 2: Agar-to-Agar Transfers (Cleaning Your Culture)
A mushroom spore print contains millions of spores with diverse genetics, and it may also carry trace contaminants from the environment. Therefore, experienced cultivators always perform 2 to 3 agar-to-agar transfers before moving forward.
In this way, each transfer leaves contamination behind and narrows the genetics toward stronger, faster-colonising mycelium. As a result, you end up with a clean and robust culture that performs much better on grain.
How to transfer
1
Identify the best growth
Identify the best growth
First, look for the healthiest, most vigorous area of mycelium on your plate. Strong, white, rhizomorphic (rope-like) strands are ideal, so avoid any areas near discolouration or contamination.
2
Cut a wedge
Cut a wedge
Next, flame-sterilise your scalpel and let it cool. Then cut a small wedge of agar (roughly 1 cm squared) from the leading edge of the healthy mycelium.
3
Transfer to a fresh plate
Transfer to a fresh plate
After that, place the wedge mycelium-side down onto the centre of a fresh agar plate. Seal with Parafilm, label, and incubate so the new plate can fully colonise.
4
Repeat if needed
Repeat if needed
Finally, repeat 1 to 2 more times until your plate shows only clean, uniform mycelial growth with no signs of contamination.
Stock up: You will need extra Petri Dishes, Parafilm, and Scalpels for this stage. In addition, buying in bulk saves money and reduces the chance of running out mid-project.
Stage 3: From Agar to Liquid Culture
Once you have a clean agar culture, you can expand it exponentially by transferring a piece of colonised agar into liquid culture (LC). Specifically, liquid culture is a nutrient-rich broth where mycelium grows in suspension. It can then be drawn up into syringes to inoculate multiple grain bags -- making it incredibly efficient for scaling your grows.
Option A: Use ready-made liquid culture vials (recommended)
Pre-made, sterile
vials contain a sterilised nutrient solution. Simply transfer a small piece of your clean agar culture into the vial using a sterile scalpel, and shake daily to encourage even growth.
Within about one week, you will consequently have a living mycelium culture ready to inject into grain.
Option B: Make your own liquid culture (DIY)
If instead you prefer making your own, here is a simple recipe you can follow from start to finish.
Ingredients
Equipment
for drawing up culture later
Process
1
Prepare and sterilise
Prepare and sterilise
To begin, mix ingredients and pour into your jars. Next, sterilise in a pressure cooker at 15 PSI for 30 minutes. After sterilisation, let everything cool to room temperature so the liquid does not damage the mycelium.
2
Inoculate
Inoculate
In your SAB, use a sterile scalpel to transfer a small scraping of surface mycelium from your clean agar plate into the liquid. At this stage, avoid dropping in too much agar -- just the mycelium is enough.
3
Incubate and agitate
Incubate and agitate
After that, seal and store at room temperature. Swirl or shake the jar daily to break up the mycelium and encourage even growth throughout the liquid.
4
Harvest the culture
Harvest the culture
After 1 to 2 weeks, fluffy mycelial growth will appear throughout the liquid. At that point, draw up this culture into a sterile syringe and use it to inoculate multiple grain spawn bags.
⚠️ If your liquid culture turns cloudy, smells sour, or shows unusual colours, it is likely contaminated. In that case, discard it and start over from a fresh agar plate so you do not risk your grain.
Stage 4: Inoculating Grain -- The Final Step
With your liquid culture (or a clean agar plate) ready, you are now set to colonise grain. Colonised grain becomes your spawn -- in other words, the engine that drives colonisation of your bulk fruiting substrate.
Option A: Use sterile spawn bags (easiest)
This is the path of least resistance and the one we highly recommend, especially when starting out. Pre-sterilised spawn bags come with a self-healing injection port and 0.2 micron filter patch, so you never even need to open the bag:
| Product | Size | Best for |
|---|---|---|
| 2L / 4L | All-round performance, great for cubensis | |
| 2L / 4L | 30 to 50% faster colonisation, 8000+ inoculation points per kg |
Simply inject 2.5 to 5 cc of your liquid culture through the injection port. After inoculation, incubate at 20 to 24 degrees Celsius for steady growth. When you see 7 to 10 cm of mycelial growth, gently knead the bag to spread the colonisation. Once fully white, mix with substrate in a monotub.
Option B: DIY grain preparation with rye berries
For the full hands-on experience, you can instead prepare your own grain spawn using
. This takes more work but gives you complete control over every step.
1
Wash and soak
Wash and soak
First, wash the rye berries thoroughly and soak them overnight for 12 to 18 hours.
2
Drain and dry
Drain and dry
After soaking, drain completely, spread the grains out, and let them surface-dry until no visible moisture remains.
3
Load and sterilise
Load and sterilise
Next, load into jars or Grow Bags with Micronfilter. Sterilise at 15 PSI for 90 minutes so every grain is fully safe for inoculation.
4
Inoculate
Inoculate
Once cooled, inoculate with liquid culture via syringe, or alternatively drop in agar wedges cut from your clean plate. In either case, aim for even distribution of mycelium across the grain.
5
Shake and colonise
Shake and colonise
Finally, shake the jar or bag when approximately 30% colonised to redistribute the mycelium evenly. Full colonisation generally takes 2 to 4 weeks, depending on temperature and strain.
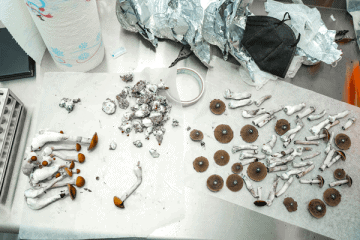
Your Complete Mushroom Spore Print Shopping List
Here is everything you need to go from mushroom spore print to fully colonised grain. In fact, you likely already have some of these items at home, so getting started may be easier than you think.
| Item | Used in stage |
|---|---|
| Stage 1 | |
| Stage 1, 2 | |
| Stage 1, 2 | |
| Stage 1, 2, 3 | |
| Stage 1 | |
| Stage 3 | |
| Erlenmeyer Flask (wide neck) | Stage 1, 3 |
| All stages | |
| All stages | |
| All stages | |
| Stage 4 | |
| Stage 4 | |
| Stage 4 | |
| Stage 4 |
Additionally, you will need a pressure cooker (15 PSI capable) and 70% isopropyl alcohol, both widely available at kitchen and pharmacy stores. Moreover, a still air box can easily be made from any large transparent plastic storage box.
Do Not Skip Agar -- The Number One Mistake
We see it all the time: enthusiastic growers try to go directly from a mushroom spore print to grain, skipping agar entirely. As a result, they face contamination, slow colonisation, and wasted time and materials.
Agar is your quality control step. In particular, it lets you:
If you are new to agar work, our step-by-step agar plates for magic mushrooms guide covers everything from the recipe to pouring, inoculating, and transferring cultures.
⚠️ Skipping agar and inoculating grain directly from a mushroom spore print significantly increases your risk of contamination and wasted supplies. Therefore, always use agar as your first step -- without exception.
Your Success Story Starts Here
Picture this: a few weeks from now, you open a grain spawn bag to find it fully colonised -- a dense, white network of healthy mycelium that you grew from a single mushroom spore print. After that, you mix it into a monotub and within days, tiny pins start pushing through the surface. Soon after, the first flush is ready to harvest and you are enjoying the results of your own hard work.
That is the power of learning how to use a spore print. Ultimately, it is the difference between following instructions on a grow kit and truly understanding the life cycle of the organism you are cultivating.
Ready to begin? Browse our Psilocybe cubensis mushroom spore prints and pick up the supplies you need to get started.
Happy growing.
February 24, 2026